
A Professional’s Portfolio for Sharpening Japanese Knives
Mastering the art of sharpening Japanese knives is not merely a skill; it is a profound dedication to precision, a hallmark of culinary professionalism. These exquisite tools, renowned for their exceptional sharpness and delicate craftsmanship, demand a unique approach to maintenance that differs significantly from their Western counterparts. Achieving and sustaining the razor-sharp edge characteristic of Japanese cutlery requires a deep understanding of blade geometry, steel properties, and the nuanced techniques of whetstone sharpening.
The Art and Precision of Sharpening Japanese Knives
Beyond the Edge: Why Japanese Knives Demand Unique Attention
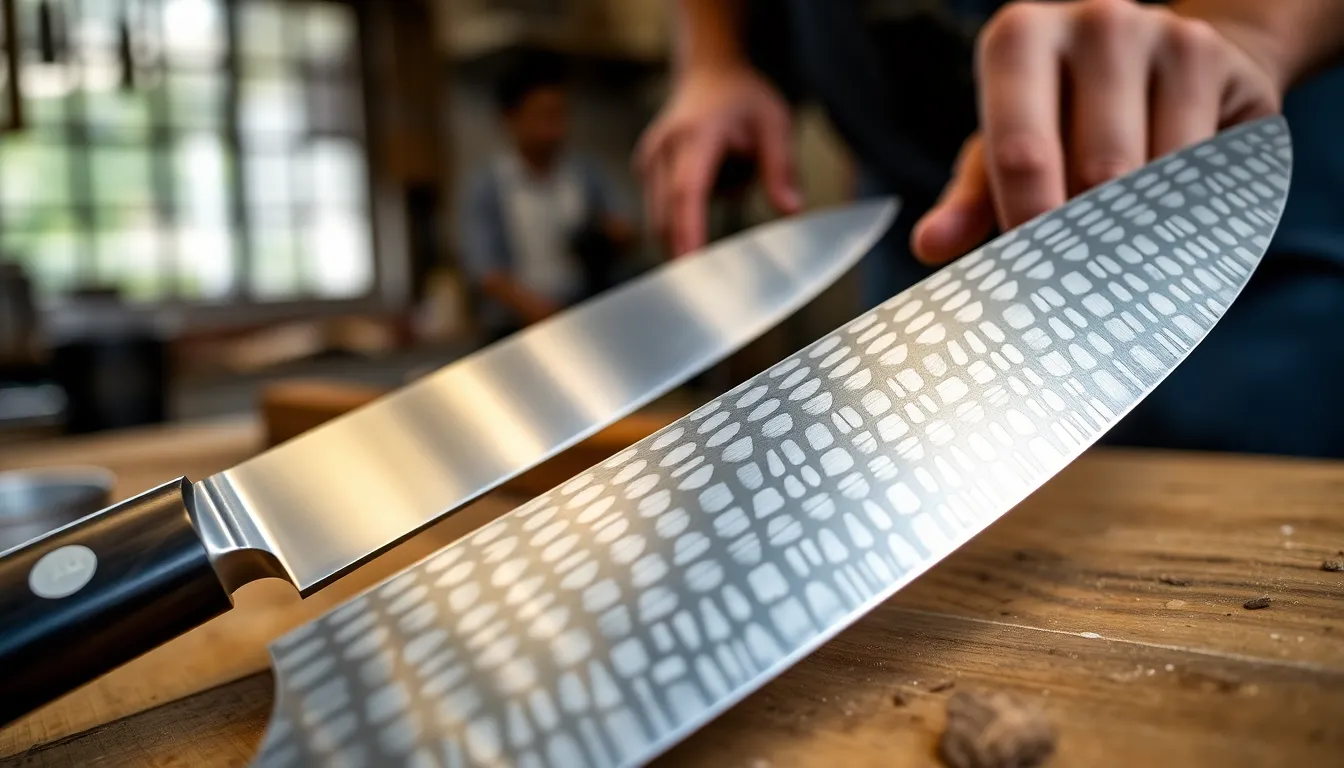
Japanese knives are distinct for several reasons, primarily their harder steel, thinner blades, and often, asymmetrical grinds. These characteristics contribute to their unparalleled cutting performance but also necessitate specific sharpening methods. Unlike softer Western knives that might tolerate a pull-through sharpener, Japanese blades require the controlled abrasion of whetstones to preserve their delicate edge and structural integrity. The precise angle and pressure applied during sharpening Japanese knives directly impact their longevity and performance.
The high carbon content in many Japanese steels allows for a much finer edge, but it also makes them more prone to chipping if not handled and sharpened correctly. This inherent brittleness means a gentle, yet firm, hand is paramount. Understanding the subtle differences in steel types, such as Aogami (blue steel) or Shirogami (white steel), is fundamental to successful sharpening Japanese knives. Each type responds differently to various grits and pressures, making a one- approach insufficient for true mastery.
Furthermore, many traditional Japanese knives feature a single-bevel grind, creating an incredibly sharp chisel-like edge that excels at specific tasks like sashimi slicing. This single-bevel design requires a completely different sharpening technique compared to the more common double-bevel blades. Neglecting these fundamental differences can lead to an uneven edge, reduced cutting performance, or even irreparable damage to the blade. Therefore, true proficiency in sharpening Japanese knives demands meticulous attention to every detail.
Setting the Foundation: A Professional’s Mindset for Sharpening
Approaching sharpening Japanese knives with a professional mindset involves patience, observation, and a commitment to continuous learning. It’s not a quick chore but a meditative process that connects you more deeply with your tools. Embrace the idea that each session offers an opportunity to refine your touch and technique. Initial attempts may not yield perfect results, but persistence is key to developing the muscle memory and tactile feedback necessary for consistent success.
A professional understands that sharpening is an act of maintenance, not just repair. Regular, light sharpening prevents the need for extensive re-profiling later, preserving the knife’s original geometry. This proactive approach minimizes material removal, extending the life of your valuable cutlery. Developing a keen sense of the blade’s condition, even before it becomes noticeably dull, is a hallmark of a skilled practitioner of sharpening Japanese knives.
Moreover, adopting a professional mindset means prioritizing safety and a clean workspace. Sharpening involves water, abrasive particles, and extremely sharp edges, necessitating vigilance. A cluttered or unstable setup can lead to accidents and impede your progress. Cultivating an environment conducive to concentration and precision is as important as the techniques themselves when you are focused on sharpening Japanese knives.
Building Your Arsenal: Essential Tools for Sharpening Japanese Knives
Navigating Whetstones: Grits, Types, and Soaking Protocols
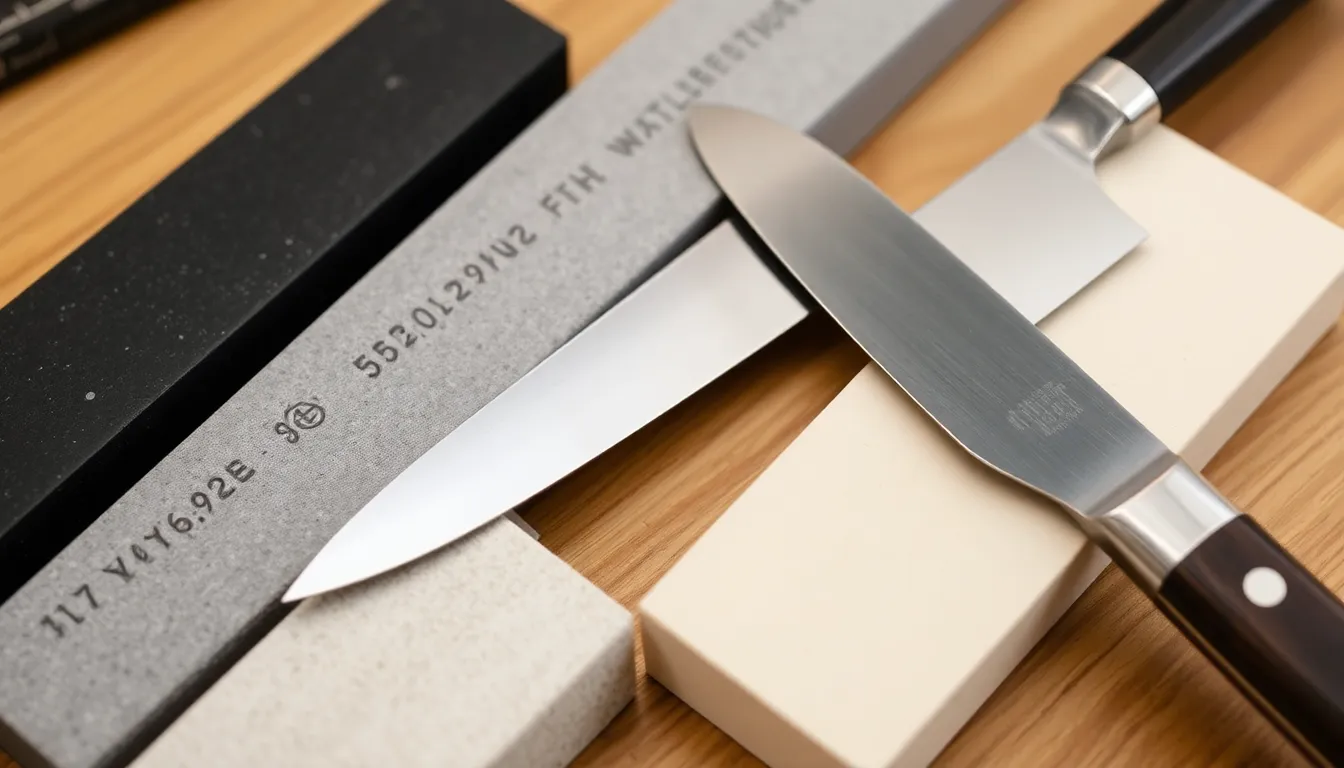
The cornerstone of sharpening Japanese knives is the whetstone, also known as a waterstone. These stones come in various grit ratings, from coarse (200-800 grit) for repair and significant reshaping, to medium (1000-3000 grit) for primary sharpening, and fine (4000-12000+ grit) for polishing and refining the edge. A common progression for general sharpening involves a 1000-grit stone, followed by a 3000-6000 grit stone. For a truly mirror-polished edge, a very high-grit stone, often 8000 or 10000 grit, is used at the final stage of sharpening Japanese knives.
Whetstones are broadly categorized into soaking stones (which need to be submerged in water for 5-15 minutes until air bubbles stop rising) and splash-and-go stones (which only require a sprinkle of water on the surface during use). Soaking stones typically provide a greater slurry, which aids in sharpening, while splash-and-go stones offer convenience and faster setup. Understanding which type of stone you have and adhering to its specific soaking or wetting protocol is crucial for optimal performance and preventing damage to the stone itself during the process of sharpening Japanese knives.
Quality matters immensely when selecting whetstones. Reputable brands like Shapton or Naniwa produce stones with consistent abrasive particles and excellent binding, ensuring effective and uniform material removal. Investing in good stones upfront will significantly improve your results and make the process of sharpening Japanese knives much more enjoyable and efficient. Always ensure your stones are flat; a dished stone will not provide a consistent angle.
Auxiliary Equipment: Nagura, Flattening Plates, and Angle Guides
Beyond the primary whetstones, several auxiliary tools are essential for effective and precise sharpening Japanese knives. A nagura stone is a small, softer stone used to create a slurry on the surface of a finer grit whetstone, enhancing its cutting action and cleaning its pores. This slurry helps to lift away metal particles, keeping the stone fresh and preventing glazing, which can occur during prolonged sharpening sessions. Using a nagura properly ensures your stones remain efficient.
Flattening plates are indispensable for maintaining the flatness of your whetstones. Over time, whetstones develop concave depressions from use, particularly in the center. A dished stone makes it impossible to maintain a consistent angle on the knife edge, leading to poor sharpening results. Diamond flattening plates or coarse silicon carbide powder on a flat surface are commonly used to resurface stones. Regularly flattening your stones is a non-negotiable step for anyone serious about sharpening Japanese knives.
While experienced sharpeners often eschew them, angle guides can be beneficial for beginners to establish the correct sharpening angle. These small clips attach to the spine of the knife, providing a physical reference for maintaining a consistent angle against the stone. However, it’s crucial to eventually transition away from relying solely on guides and develop a feel for the angle by hand. This tactile feedback is essential for truly mastering the art of sharpening Japanese knives on various blade profiles.
Preparing Your Workspace: Safety and Efficiency Considerations
An organized and safe workspace is paramount when engaged in the meticulous task of sharpening Japanese knives. Start with a stable, non-slip surface, such as a rubber mat or a wet towel, to prevent your whetstones from sliding during use. A dedicated sharpening station, even if it’s just a corner of your kitchen counter, helps in creating a routine and a focused environment. Ample lighting is also crucial to observe the edge as it develops and to spot any imperfections. Natural light is ideal, but a bright task light can also suffice.
Have a continuous supply of clean water readily available, whether it’s a small basin for soaking stones or a spray bottle for splash-and-go types. This ensures your stones remain adequately lubricated, preventing heat buildup and promoting efficient material removal. A few old towels or rags are also indispensable for wiping down the blade, cleaning up slurry, and protecting your work surface. Keeping the area tidy prevents cross-contamination between different grit stones and makes the entire process of sharpening Japanese knives more hygienic.
Lastly, prioritize personal safety. While not strictly necessary for every sharpening task, having cut-resistant gloves nearby is a sensible precaution, especially when handling extremely sharp blades or learning new techniques. Always position your body in a way that allows for comfortable movement and stable pressure application, minimizing strain and the risk of accidental slips. A well-prepared workspace enhances both the safety and efficiency of your sharpening Japanese knives endeavors.
Mastering the Fundamentals: Angles and Techniques for Japanese Knives
Double-Bevel Mastery: Consistent Angles for Gyuto and Santoku
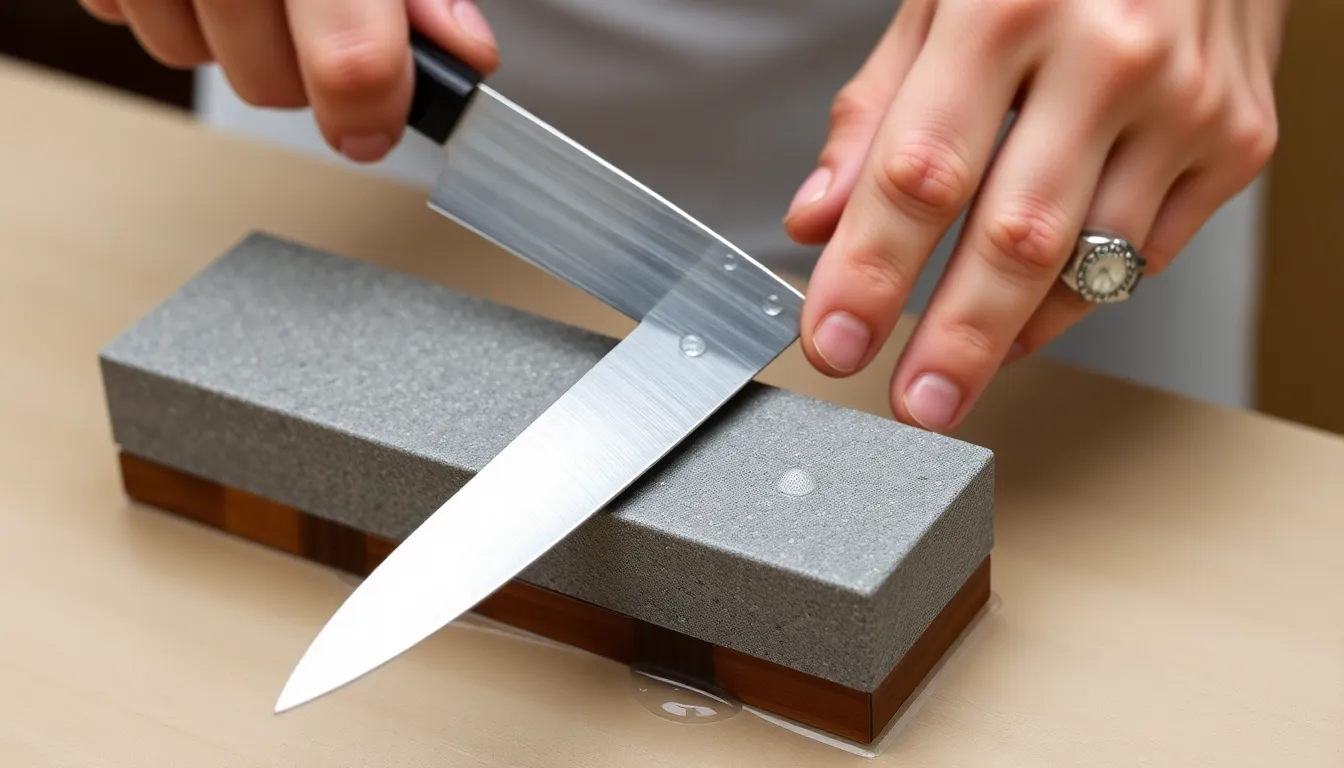
Most common Japanese kitchen knives, such as the Gyuto (chef’s knife) and Santoku (all-purpose knife), feature a double-bevel edge, meaning both sides of the blade taper to meet at the cutting edge. For these knives, the goal when sharpening Japanese knives is to establish and maintain a consistent angle on both sides. A typical sharpening angle for a Japanese double-bevel knife ranges from 10 to 15 degrees per side, resulting in a total inclusive angle of 20 to 30 degrees. This acute angle contributes to their renowned cutting prowess.
To achieve consistency, position the knife on the whetstone so that the desired angle is formed between the blade face and the stone’s surface. Use your fingers to support the blade close to the edge, applying gentle, even pressure. Push the knife away from you across the stone, then pull it back, maintaining the angle throughout the stroke. Imagine you are trying to slice a thin layer off the stone. Consistent pressure and a stable angle are far more important than speed or force when sharpening Japanese knives. Focus on feeling the edge make contact with the stone.
Work in sections along the blade, from heel to tip, ensuring each part of the edge receives adequate attention. For the belly or curved portion of the blade, you will need to subtly raise the handle as you sharpen to maintain contact. The key is to avoid “rounding over” the edge. After sharpening one side, flip the knife over and repeat the process on the other side. The aim is to create a burr along the opposite side of the edge before moving to a finer grit. This systematic approach ensures an evenly sharpened edge every time you are sharpening Japanese knives.
The Nuance of Single-Bevel: Sharpening Yanagiba, Deba, and Usuba
Single-bevel Japanese knives, like the Yanagiba (slicing knife), Deba (butchering knife), and Usuba (vegetable knife), present a distinct challenge in sharpening Japanese knives due to their asymmetrical grind. These knives typically have a primary bevel on one side (the omote or “front”) and a subtle hollow grind (ura or “back”) on the opposite side. The cutting edge is formed by the intersection of the primary bevel and the ura. Sharpening these requires understanding how each surface contributes to the edge.
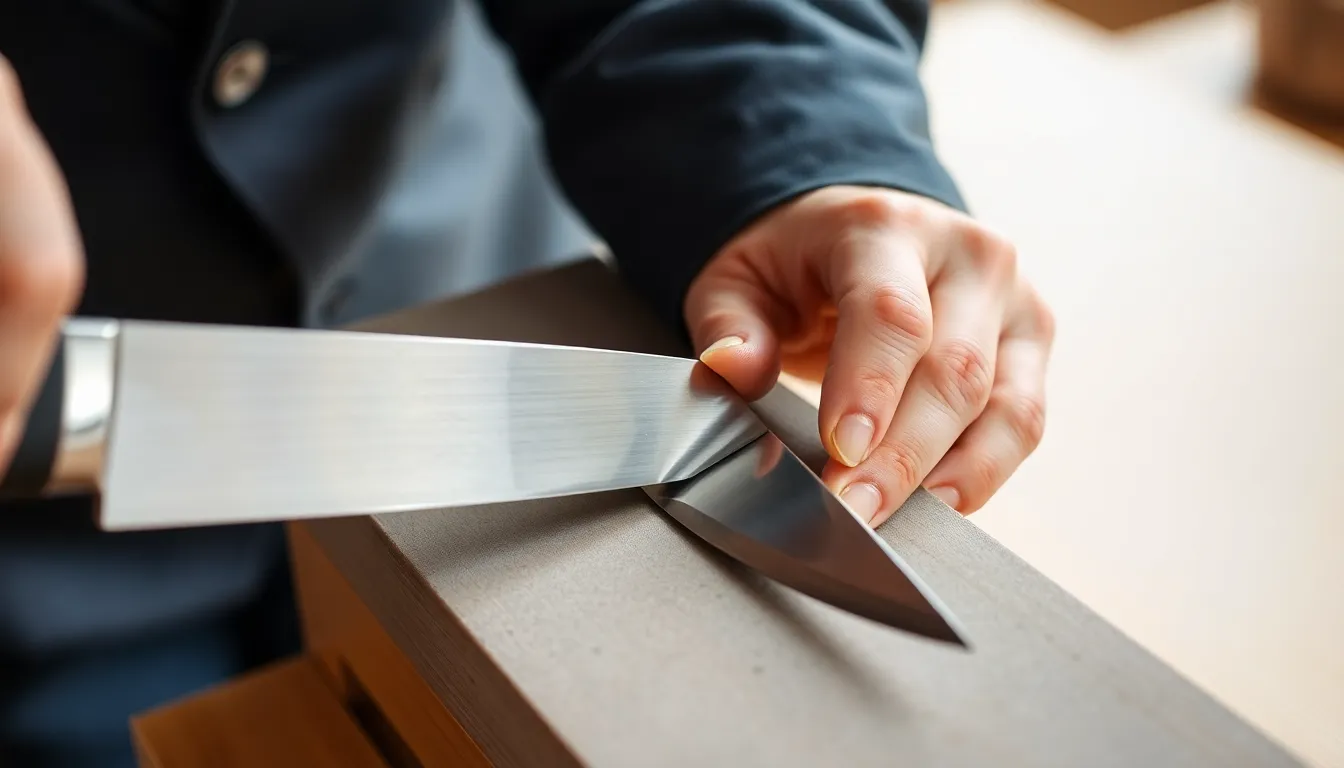
For the primary bevel (the large, flat side), place the entire surface flat against the whetstone. The goal is to sharpen this broad surface, not just the very edge, working from the heel to the tip. Use long, sweeping strokes, ensuring even pressure across the entire bevel. This helps to maintain the correct angle and geometry of the knife. On higher grit stones, you’re essentially polishing this bevel to reduce cutting resistance. This comprehensive approach is critical when sharpening Japanese knives with a single bevel.
The ura side (the back) is sharpened much more sparingly. It is a subtle hollow grind, often called a “back grind.” For this side, lay the knife completely flat on the stone, ensuring only the two raised “lands” or the extreme edge of the hollow grind make contact. Use very light pressure and only a few strokes to remove the burr formed from sharpening the primary bevel. Over-sharpening the ura can destroy the hollow grind and the knife’s unique cutting performance. The precision required for sharpening Japanese knives with a single bevel truly highlights the artistry involved.
The Critical Role of the Burr: Detection, Formation, and Removal
The burr, also known as a wire edge, is a crucial indicator of successful material removal when sharpening Japanese knives. It is a tiny, microscopic curl of metal that forms on the opposite side of the edge you are currently sharpening. When you feel the burr evenly along the entire length of the blade, it signifies that you have fully ground the existing edge away and created a new apex. Without forming a burr, your knife will never achieve true sharpness, no matter how much you sharpen.
To detect the burr, gently run your thumb perpendicular to the edge from the spine towards the cutting edge. You will feel a slight, rough catch or lip. Be extremely cautious as the burr can be very sharp. Alternatively, you can drag your fingernail along the edge; if it catches, a burr is present. It’s vital to ensure the burr is consistent from the heel to the tip before moving to the next stage or switching sides. This consistency confirms you have worked the entire edge properly during sharpening Japanese knives.
Once formed, the burr must be removed cleanly. For double-bevel knives, this involves alternating very light strokes on each side of the blade on a finer grit stone, gradually reducing the pressure until the burr detaches. For single-bevel knives, the burr is removed primarily by a few very light passes on the ura side. Sometimes, a final light pass through a soft material like cork or wood can help to break off any remaining microscopic burr. Proper burr removal is the final step to achieving a truly refined and durable edge when sharpening Japanese knives.
The Multi-Stage Process of Sharpening Japanese Knives
Repair and Reshaping: Low Grit Stone Applications for Damage Correction
The initial stage of sharpening Japanese knives, particularly for damaged or very dull blades, involves using a coarse grit whetstone, typically ranging from 120 to 400 grit. These aggressive stones are designed for rapid material removal, making them ideal for repairing chips, correcting significant profile issues, or establishing a new primary bevel angle. If your knife has a noticeable flat spot or micro-chips along the edge, this is where you begin the journey back to sharpness. It’s a critical step in restoring the knife’s geometry.
When using a low-grit stone, focus on grinding down to the deepest point of the chip or imperfection. This often means removing more steel than you might anticipate. Apply firm, consistent pressure and use broad, sweeping strokes to ensure even material removal across the affected area. It’s crucial to maintain your intended angle during this process to avoid introducing new inconsistencies. The slurry produced by coarse stones is thick and dark, indicating effective grinding. This initial phase of sharpening Japanese knives sets the stage for all subsequent steps.
After addressing the damage, the edge may appear quite rough and toothy. This is normal and expected. The goal of this stage is structural correction, not final sharpness. Once the edge is free of chips and the profile is restored, you’re ready to move on to progressively finer grits. Do not skip this essential repair phase if your knife is significantly damaged, as it directly impacts the ultimate sharpness and performance. Patience here pays dividends in the overall process of sharpening Japanese knives.
Primary Sharpening: Medium Grit for Apex Refinement and Sharpness
Once the blade’s profile is corrected and any major damage is addressed, the next step in sharpening Japanese knives is to refine the edge using a medium-grit whetstone. Stones in the 800 to 2000 grit range are considered medium and are responsible for creating the initial working sharpness of the blade. A 1000-grit stone is often the workhorse of a sharpening progression, as it effectively removes the coarse scratches from the previous stone and begins to establish a refined apex.
On a medium-grit stone, the focus shifts from aggressive material removal to apex refinement. Maintain the same consistent angle established in the previous stage, but adjust your pressure to be firm yet controlled. You are now refining the microscopic teeth on the edge, making them smaller and more uniform. Use deliberate, controlled strokes, ensuring you feel the formation of a fine burr across the entire length of the blade on the opposite side. This burr indicates that the two facets of the edge have met and formed a new, sharper apex.
Spend sufficient time on this stone until the burr is uniform and easily detectable. For double-bevel knives, alternate sides every few strokes once the burr forms, aiming to thin and eventually remove it. For single-bevel knives, focus primarily on the omote (front) side, using minimal strokes on the ura (back) to remove the burr. This stage is where the knife truly starts to become sharp, capable of cleanly slicing paper or even delicate vegetables. Proper execution at this stage is fundamental for effective sharpening Japanese knives.
Polishing and Honing: High Grit for Razor Sharpness and Edge Retention
The final stages of sharpening Japanese knives involve moving to high-grit whetstones, typically ranging from 3000 to 12000 grit or even higher. These stones don’t remove much material; instead, they polish the microscopic facets of the edge, transforming the toothy edge from the medium grit stone into a refined, mirror-polished apex. This polishing action not only makes the knife incredibly sharp but also enhances edge retention and reduces cutting resistance. A highly polished edge glides through food with minimal effort.
On high-grit stones, reduce your pressure significantly. Your strokes should be feather-light, focusing on feeling the edge gently glide across the stone. The goal is to remove the microscopic scratches left by the previous grit and further refine the apex. For double-bevel knives, alternate sides frequently, perhaps every 1-2 strokes, gradually reducing pressure until you are using only the weight of the blade itself. For single-bevel knives, continue to focus on the omote, with very light polishing passes on the ura to ensure perfect burr removal and final refinement.
The result of proper high-grit polishing is an edge that can effortlessly shave hair, slice through ripe tomatoes with no resistance, and even push-cut paper. This level of sharpness is what truly distinguishes a well-maintained Japanese knife. Some sharpeners may even finish with a leather strop loaded with a fine abrasive compound to further polish and align the apex, maximizing its keenness. The meticulous attention to detail in this final stage elevates the act of sharpening Japanese knives to an art form, providing an exceptional cutting experience for any culinary task.
Elevating Your Craft: Advanced Approaches to Sharpening Japanese Knives
Uraoshi: The Art of Back Grinding for Single-Bevel Blades
Uraoshi is an advanced technique specific to single-bevel Japanese knives, crucial for maintaining their unique cutting performance. It involves refining the ura, or the hollow ground back side of the blade. Over time, as a single-bevel knife is sharpened on its omote (front) side, the ura can develop a slight wire edge or become less effective in its function. Uraoshi addresses this by carefully grinding the ura to restore its subtle hollow and ensure it meets the primary bevel cleanly to form the cutting edge. This specific detail is paramount in precision sharpening Japanese knives.
The ura is designed to reduce stiction (sticking of food to the blade) and facilitate clean cuts. Proper uraoshi helps maintain the knife’s intended cutting geometry. To perform uraoshi, the knife is laid perfectly flat on a very fine grit whetstone (typically 6000 grit or higher), ensuring that only the two raised “lands” of the ura make contact. Very light, even pressure is applied, using a few careful strokes. The goal is to remove any burr, refine the contact points, and restore the suction-reducing properties of the hollow grind without over-grinding and destroying the ura. This delicate balance is what truly sets apart masterfully sharpening Japanese knives.
It’s important to note that uraoshi is not done every time you sharpen a single-bevel knife. It’s typically performed only when necessary, perhaps after several sharpening sessions or if the knife begins to stick more when cutting. Overdoing uraoshi can quickly remove too much steel from the delicate ura, potentially damaging the knife’s unique properties. Developing the feel for when and how much uraoshi is needed comes with practice and a deep understanding of single-bevel knife geometry, truly elevating your capability for sharpening Japanese knives.
Addressing Challenging Steels: Strategies for Hardness and Brittleness
Japanese knives often feature very hard steels, such as Aogami Super (Blue Super Steel) or ZDP-189, which can reach Rockwell hardness levels of 63 HRC and above. While these steels hold an incredibly sharp edge, they can also be challenging to sharpen and are more prone to chipping due to their brittleness. Adapting your sharpening strategy to the specific steel type is an advanced skill in sharpening Japanese knives. Softer stones might feel gummy on harder steels, while harder stones might load up quickly.
For very hard steels, selecting appropriate whetstones is crucial. Some synthetic stones are specifically designed for very hard alloys, offering efficient cutting without excessive dishing. Using quality diamond plates for flattening stones is also vital, as hard steels can quickly dish out softer conventional whetstones. The key is to apply slightly less pressure on very hard and brittle steels to avoid micro-chipping during the sharpening process. Focus on smooth, consistent strokes rather than brute force when sharpening Japanese knives made from these materials.
Furthermore, managing the burr on hard, brittle steels requires extra care. The burr can be very stubborn and prone to breaking off unevenly. Using extremely light, alternating strokes on high-grit stones and potentially incorporating a stropping stage can help in cleanly removing the burr without damaging the newly formed apex. Understanding the metallurgy of your particular knife steel enhances your ability to perform advanced sharpening Japanese knives techniques, leading to superior and more durable edges. For more information on various blade materials, consider visiting Japanese Knives World – Blade Materials.
Profile Correction and Chip Repair: Beyond Basic Sharpening
Beyond basic edge maintenance, advanced sharpening Japanese knives skills include comprehensive profile correction and significant chip repair. Sometimes a knife develops a “belly” or “hump” in its profile due to uneven sharpening or excessive use, causing it to rock on a flat surface rather than making continuous contact. Correcting this involves using a coarse stone to carefully grind down the high spots until the desired flat profile is restored. This requires a keen eye and patience, as it reshapes the entire blade.
Large chips, particularly in the heel or tip of the blade, present a more substantial repair challenge. This often necessitates grinding back the entire section of the blade to remove the chip, effectively shortening the blade slightly. This process uses very coarse stones (e.g., 120-400 grit) and requires a methodical approach to ensure the new profile is smooth and aesthetically pleasing. It’s crucial to constantly check your work and ensure you’re not introducing new high or low spots into the blade’s profile. Mastering these repairs transforms your ability to perform comprehensive sharpening Japanese knives maintenance.
For intricate repairs or significant re-profiling, a skilled sharpener understands when to use different parts of the stone and how to apply varying pressures. For example, focusing pressure on one area to remove a high spot, then distributing it evenly to blend the repair. This level of manipulation of the blade and stone goes beyond simply creating a sharp edge; it involves restoring the very essence of the knife’s design and function. These advanced techniques are what differentiate basic maintenance from truly professional sharpening Japanese knives capabilities.

Diagnosing Imperfections: Troubleshooting Your Sharpening Japanese Knives Efforts
When the Edge Isn’t Right: Common Sharpening Errors and Solutions
Even with practice, issues can arise when sharpening Japanese knives. One common problem is an edge that feels sharp in some spots but dull in others. This usually indicates inconsistent angle maintenance along the blade. The solution is to return to a medium-grit stone and focus on feeling the blade’s contact point across the entire edge, ensuring every part gets equal attention at the correct angle. Use a marker pen on the edge to visualize where material is being removed.
If your knife feels sharp but struggles to slice through soft items like paper, it might be suffering from a persistent burr that hasn’t been cleanly removed. This “false edge” feels sharp but lacks stability. The remedy involves extra refinement on high-grit stones with extremely light pressure, or a few passes on a leather strop to properly deburr. Sometimes, an inconsistent burr indicates uneven pressure or an angle that’s too shallow. Refining your touch is crucial for effective sharpening Japanese knives.
Another issue is an edge that quickly dulls after sharpening. This could be due to an angle that’s too acute for the steel, leading to micro-chipping, or an unrefined apex. Try increasing the angle slightly (e.g., from 12 to 15 degrees) or spending more time on your highest grit stone to fully polish the edge. A common error is not sharpening enough at the coarse or medium stages, leading to an inadequately formed apex before moving to polishing. Each stage of sharpening Japanese knives must be completed thoroughly.
Maintaining Consistency: Overcoming Angle and Pressure Challenges
Consistency in angle and pressure is the single most challenging aspect of mastering sharpening Japanese knives. Many beginners struggle with “wobbling” the angle, which results in a rounded or inconsistent edge that never truly gets sharp. To overcome this, focus on maintaining a stable wrist and elbow. Some techniques involve locking your wrist and moving your entire arm from the shoulder, especially for longer strokes. Practicing on cheaper knives or even old kitchen knives can help build muscle memory without fear of damaging your prized Japanese cutlery.
Uneven pressure is another common pitfall. Too much pressure can chip delicate Japanese steel, while too little won’t remove material effectively. The key is to distribute pressure evenly along the section of the blade you’re sharpening. For the tip, more pressure might be needed towards the tip itself, while for the heel, focus pressure there. Developing a “feel” for the stone’s feedback is critical. When sharpening Japanese knives, the sound and resistance of the blade on the stone can tell you a lot about your pressure distribution.
Regular practice with attention to these details is the only way to achieve true consistency. Consider using a protractor or an angle app on your phone occasionally to check your perceived angle against the actual angle. Over time, your hands will instinctively find the correct position and pressure. The journey of sharpening Japanese knives is one of continuous refinement, and overcoming these challenges is a significant part of that growth. For more detailed troubleshooting tips, visit Japanese Knives World – Troubleshooting Knife Issues.
Blade Damage and Scratches: Prevention and Rectification
Accidental damage during sharpening Japanese knives can be frustrating but is often preventable. Scratches on the blade’s face, particularly above the sharpening bevel, typically occur from resting the blade too flat on the stone or from abrasive particles caught between the blade and the stone. To prevent this, always ensure your blade is clean, and regularly rinse off accumulated slurry from the stone and blade. Using masking tape along the blade’s face, just above the edge, can also protect it from superficial scratches, especially when working with coarser stones.
More severe damage, such as large chips or a bent tip, usually stems from improper handling during cutting or dropping the knife, rather than sharpening itself. However, attempts to fix these without proper technique can worsen the issue. For significant chips, a low-grit stone is necessary to grind past the damage and re-establish a continuous edge. This often means removing a considerable amount of steel. For bent tips, very careful hammering on a soft surface, followed by grinding, might be required, though professional repair is often recommended for such issues.
Prevention is always better than cure. Store your Japanese knives properly, away from other utensils that might cause nicks or chips. Use a cutting board made from a soft material like wood or composite, never glass or stone, which can quickly dull and damage fine edges. Gentle handling and respecting the delicate nature of these blades will drastically reduce the need for extensive repair work, allowing your focus to remain on the precise art of sharpening Japanese knives for optimal performance.
Sustaining Excellence: Post-Sharpening Care and Long-Term Maintenance
Daily Care: Cleaning, Drying, and Storage Best Practices
The performance of your expertly sharpened Japanese knife depends heavily on its daily care and maintenance. After each use, immediately clean the knife with warm water and a soft cloth or sponge. Avoid abrasive scrubbers or harsh detergents, which can strip away the blade’s patina or damage the handle. Prompt cleaning prevents food acids from reacting with the steel, which can lead to staining or rust, especially on high-carbon blades. This simple step is vital for extending the life of your blade.
Thorough drying is equally crucial. Japanese knives, especially those made from high-carbon steel, are prone to rusting if left wet. Use a clean, dry towel to wipe the blade completely dry immediately after washing. For added protection, a very thin coat of food-grade mineral oil or camellia oil can be applied to the blade before storage, particularly if the knife won’t be used for an extended period. This creates a protective barrier against moisture. These habits complement the effort you put into sharpening Japanese knives.
Proper storage is the final piece of daily care. Never store Japanese knives loose in a drawer where they can jostle against other utensils, risking damage to their delicate edges. Magnetic knife strips, knife blocks, or individual blade guards are excellent options that protect the edge and prevent accidents. For a deeper dive into overall knife care, consider visiting Japanese Knives World – Knife Care. By adhering to these best practices, you ensure your efforts in sharpening Japanese knives translate into enduring sharpness and beauty.
Frequency and Impact: How Regular Sharpening Affects Blade Life
The frequency of sharpening Japanese knives depends largely on usage, the type of steel, and personal preference. For professional chefs, daily or every-other-day light honing on a fine ceramic rod or a high-grit stone might be necessary to maintain peak performance. For home cooks using their knives a few times a week, a full whetstone sharpening session every few weeks to a month might suffice. The key is to sharpen *before* the knife becomes completely dull, as this prevents excessive material removal.
Regular, light sharpening (often referred to as ‘touching up’ or ‘honing’) minimally removes steel, preserving the knife’s overall blade life. It addresses microscopic dulling and helps realign the edge before it folds or chips. In contrast, letting a knife become excessively dull before sharpening necessitates more aggressive grinding on coarser stones, which removes more material and shortens the knife’s lifespan over many years. This proactive approach minimizes wear and tear on the blade itself, making the overall process of sharpening Japanese knives more sustainable.
The impact of consistent, gentle sharpening is profound: it extends the life of your knife, maintains optimal cutting performance, and reduces the risk of injury from a dull blade. A properly maintained knife requires less force to cut, leading to greater precision and less fatigue. It also ensures that your investment in quality Japanese cutlery continues to perform at its peak for decades. Understanding this relationship between frequency and blade health is a cornerstone of responsible knife ownership and effective sharpening Japanese knives.
The Professional Touch: When to Consider Expert Sharpening Services
While mastering the art of sharpening Japanese knives is a rewarding journey, there are times when entrusting your valuable blades to a professional sharpening service is the wisest choice. This is particularly true for significant damage like large chips, broken tips, or extensive profile correction that might be beyond your current skill level or equipment. Professionals have specialized tools, such as belt grinders or highly experienced hands, to tackle complex repairs without compromising the blade’s integrity. For specialized knife types, such as some Japanese Knife Types, a professional touch might be essential.
Furthermore, if you own very expensive or rare Japanese knives, or if you simply lack the time or inclination to learn the intricate techniques, a professional sharpener can ensure your blades receive the highest level of care. They possess the nuanced understanding of various steel types and blade geometries required to achieve truly exceptional edges. Finding a reputable sharpener specializing in Japanese cutlery is crucial; not all sharpeners are equipped or knowledgeable enough to handle these delicate instruments.
Consider expert services for re-establishing a proper primary bevel on single-bevel knives if you’re struggling, or for restoring the intricate uraoshi. A professional sharpening session can act as a baseline, providing you with a perfectly sharpened knife from which you can maintain the edge through regular, lighter sharpening sessions at home. It’s an investment in the longevity and performance of your tools, ensuring that the legacy of Japanese craftsmanship endures. Ultimately, whether you sharpen yourself or seek professional help, the commitment to maintaining a razor-sharp edge remains paramount for optimal use of your Japanese knives.
The Enduring Legacy of a Precisely Sharpened Edge
Embracing the Journey: Continuous Improvement in Sharpening Japanese Knives
The journey of mastering sharpening Japanese knives is an ongoing process of continuous improvement. There is no single endpoint, but rather an evolving understanding of steel, angles, pressure, and the subtle feedback from the stone. Each sharpening session, whether successful or challenging, offers valuable lessons. Embrace the imperfections along the way as opportunities to learn and refine your technique. Document your experiences, perhaps noting which grits worked best for certain knives or how different pressures affected the burr formation. This reflective practice accelerates your learning curve in sharpening Japanese knives.
Seek out resources, watch demonstrations from seasoned masters, and even connect with other knife enthusiasts. The community around Japanese knives and sharpening is vast and supportive. Experiment with different types of whetstones, strops, and techniques as your skills advance. What works perfectly for one knife might be slightly adjusted for another, highlighting the dynamic nature of this craft. The more you engage with the process, the more intuitive and satisfying it becomes, truly transforming the chore of sharpening into a meditative and rewarding skill.
Remember that the goal is not just a sharp knife, but an understanding of the mechanics behind that sharpness. This deeper knowledge allows you to diagnose issues, adapt to different blades, and consistently achieve superior results. The enduring appeal of sharpening Japanese knives lies in this perpetual pursuit of perfection, a dedication to craftsmanship that mirrors the very knives themselves. It is a skill that offers practical benefits in the kitchen and profound personal satisfaction in its mastery.
The Reward of Precision: Why a Mastered Edge Matters
The tangible reward of precision in sharpening Japanese knives is immediately evident in the kitchen. A truly sharp knife transforms the cooking experience. Ingredients are prepared effortlessly, with clean, precise cuts that preserve their integrity and enhance presentation. Vegetables slice cleanly without bruising, delicate proteins are portioned with ease, and even the simplest tasks become a pleasure. This efficiency and precision not only save time but also elevate the quality of your culinary creations, making every dish a testament to thoughtful preparation.
Beyond performance, a mastered edge speaks volumes about your dedication to your craft and your tools. It signifies respect for the materials and the centuries-old traditions of Japanese blade-making. A sharp knife is also a safer knife; it requires less force to cut, reducing the risk of slippage and accidents. This increased safety, coupled with unparalleled efficiency, makes the effort invested in sharpening Japanese knives profoundly worthwhile. It’s an investment in your safety, your culinary passion, and the longevity of your valuable cutlery.
Ultimately, the satisfaction derived from using a perfectly sharpened Japanese knife is immense. The subtle whisper of a blade gliding through food, the mirror-polished edge gleaming under the light, and the ease with which tasks are completed all contribute to a heightened culinary experience. This mastery over the edge is a skill that empowers, enriches, and profoundly enhances your connection to the art of cooking. The journey of sharpening Japanese knives is one that continually rewards those who embrace its challenges and celebrate its precision.
Explore more in-depth articles on Japanese knives and their care:
Japanese Knives World
Expert reviews, buying guides and craftsmanship stories about Japanese kitchen knives.
Talk to the teamRelated articles
The Definitive 2025 Japanese Chef Knives Reviews: A Professional Evaluation of Performance and Craftsmanship
Navigating the world of high-end cutlery requires a deep understanding of metallurgy, ergonomics, and traditional craftsmanship. In this definitive guide to japanese chef knives reviews, we evaluate the top-tier blades that are defining the culinary landscape in 2025. Whether you are a professional executive chef or a dedicated home cook, selecting the right Japanese blade […]
Zwilling Japanese Knives: The Ultimate Professional Evaluation for 2025
Welcome to the definitive guide for discerning chefs and culinary enthusiasts exploring the exceptional world of zwilling japanese knives. This comprehensive evaluation for 2025 delves into how these meticulously crafted tools, primarily under the esteemed Miyabi brand, fuse German engineering precision with ancient Japanese blade artistry. Discover why these premium knives are not just instruments, […]
Unveiling the Ultimate Japanese Chefs Knives Review: Expert Insights for 2025
Welcome to the definitive guide on the finest Japanese culinary tools. This comprehensive japanese chefs knives review dives deep into the world of precision craftsmanship, unparalleled sharpness, and ergonomic design that sets Japanese knives apart. Choosing the right chef knife can profoundly transform your cooking, making every slice, dice, and chop a true pleasure. We […]