
The Masterclass in Sharpening Japanese Kitchen Knives: 7 Essential Techniques
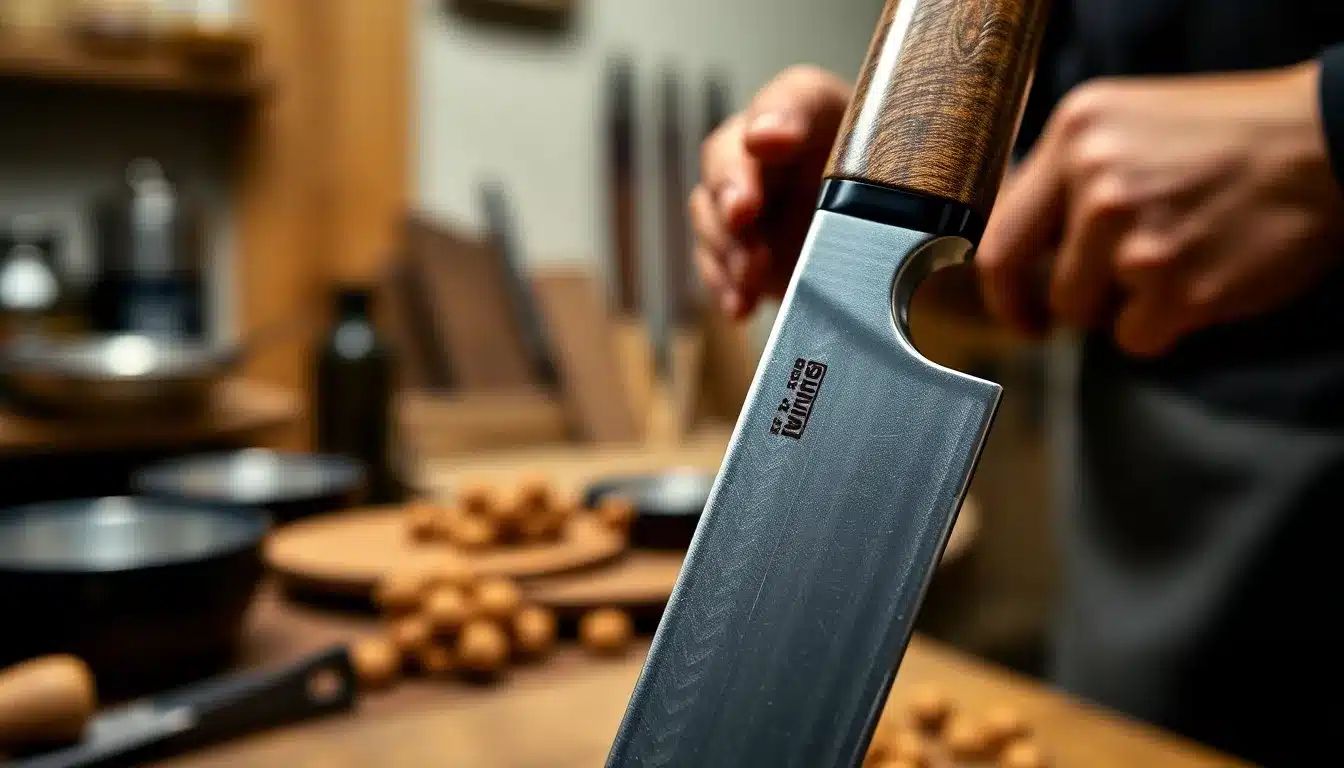
Learning how to sharpen japanese kitchen knives is not merely a chore; it is an essential skill that elevates your culinary experience and preserves the integrity of these exquisite tools. Japanese knives, renowned for their exceptional sharpness and precision, require a specialized approach to maintenance that differs significantly from their Western counterparts. Neglecting proper sharpening techniques can lead to frustrating performance issues, including dull edges, damaged blades, and a diminished joy in your cooking.
This comprehensive guide will demystify the art of sharpening, providing you with the knowledge and step-by-step instructions to restore your Japanese knives to their razor-sharp glory. By understanding the unique characteristics of Japanese steel and blade geometry, you will gain the confidence to maintain your prized possessions, ensuring they remain peak performers in your kitchen for years to come. Mastering how to sharpen japanese kitchen knives transforms a mundane task into a rewarding practice that honors the craftsmanship of these tools.
The Art and Precision of Sharpening Japanese Kitchen Knives
Why Japanese Knives Demand Specialized Sharpening
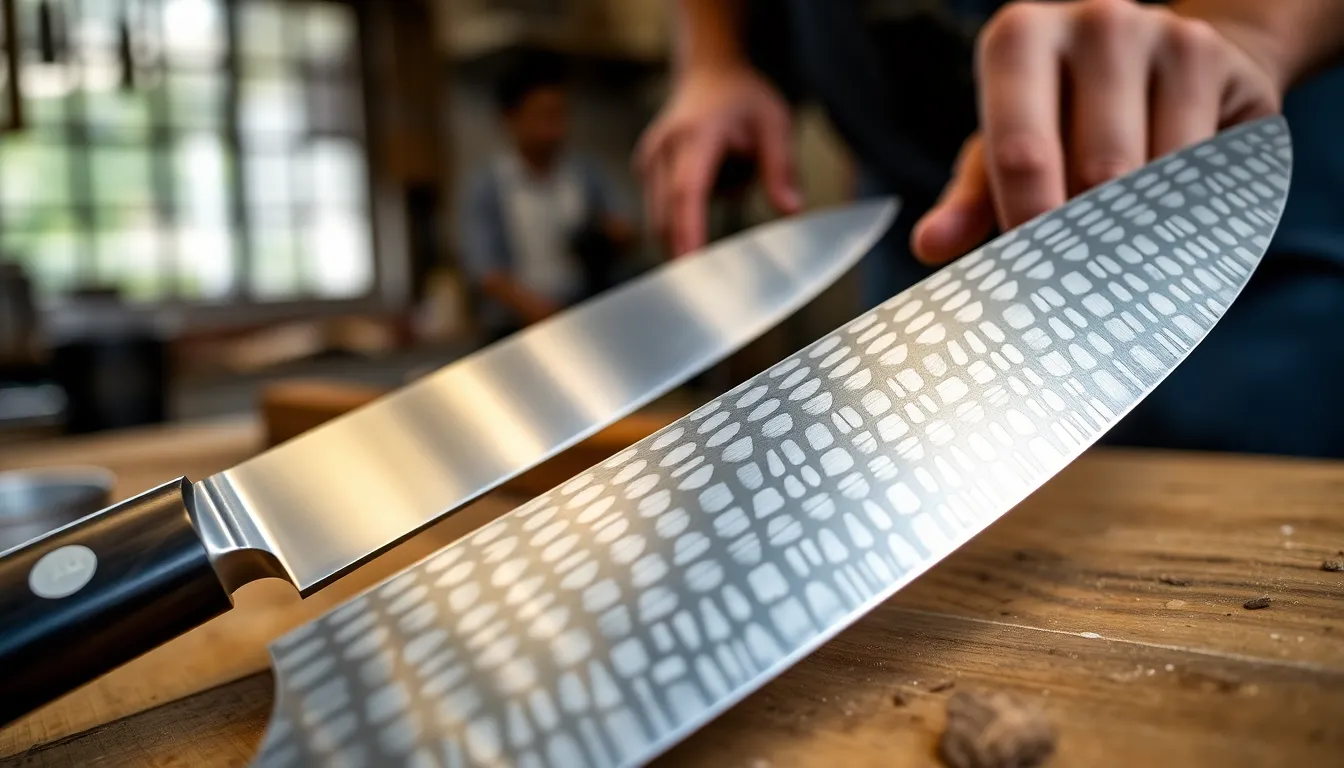
Japanese kitchen knives are celebrated globally for their unparalleled sharpness, edge retention, and precision, but these attributes stem from distinct design philosophies and materials. Unlike many Western knives that feature softer steel and thicker edge angles, Japanese knives often utilize harder, high-carbon steels that allow for significantly finer, more acute bevels. This harder steel, while capable of holding an incredibly sharp edge, is also more brittle and susceptible to chipping if not handled and sharpened correctly.
The unique geometry of many Japanese blades, especially traditional single-bevel knives like the Yanagiba or Deba, further dictates a specialized sharpening regimen. These knives are designed with an asymmetrical grind, where only one side is beveled, demanding a precise approach to maintain their specific cutting action. Understanding these fundamental differences is the first critical step in learning how to sharpen japanese kitchen knives effectively and safely.
Traditional methods involving whetstones are almost always preferred for Japanese knives over electric sharpeners or pull-through devices, which can remove too much material, alter the delicate blade geometry, and even damage the hard steel. The finesse required to sharpen these blades correctly ensures longevity and optimal performance, making the investment in proper technique invaluable.
Beyond the Basic Edge: Unlocking Peak Performance
Achieving a basic sharp edge is one thing, but truly unlocking the peak performance of a Japanese kitchen knife involves a deeper understanding of edge refinement and maintenance. A truly sharp Japanese knife doesn’t just cut; it glides through ingredients with minimal effort, preserving their texture and flavor. This level of sharpness is not simply about having a thin edge; it’s about the consistency of that edge, its polish, and its ability to withstand repeated use without degradation.
The journey to mastering how to sharpen japanese kitchen knives involves cultivating patience and developing a tactile feel for the blade. It’s about more than just brute force; it’s about subtle movements, consistent angles, and the meticulous progression through various grit levels of whetstones. Each stage contributes to an increasingly refined edge, moving from initial stock removal to microscopic polishing that culminates in a razor-sharp, durable edge.
Furthermore, maintaining this peak performance isn’t a one-time event. Regular honing and periodic re-sharpening are crucial to prevent the edge from becoming dull. By embracing these practices, you ensure that your Japanese knives consistently perform at their best, making every slicing, dicing, and chopping task a true pleasure in the kitchen. This dedication to maintenance is what truly sets apart the casual user from the true enthusiast of fine cutlery.
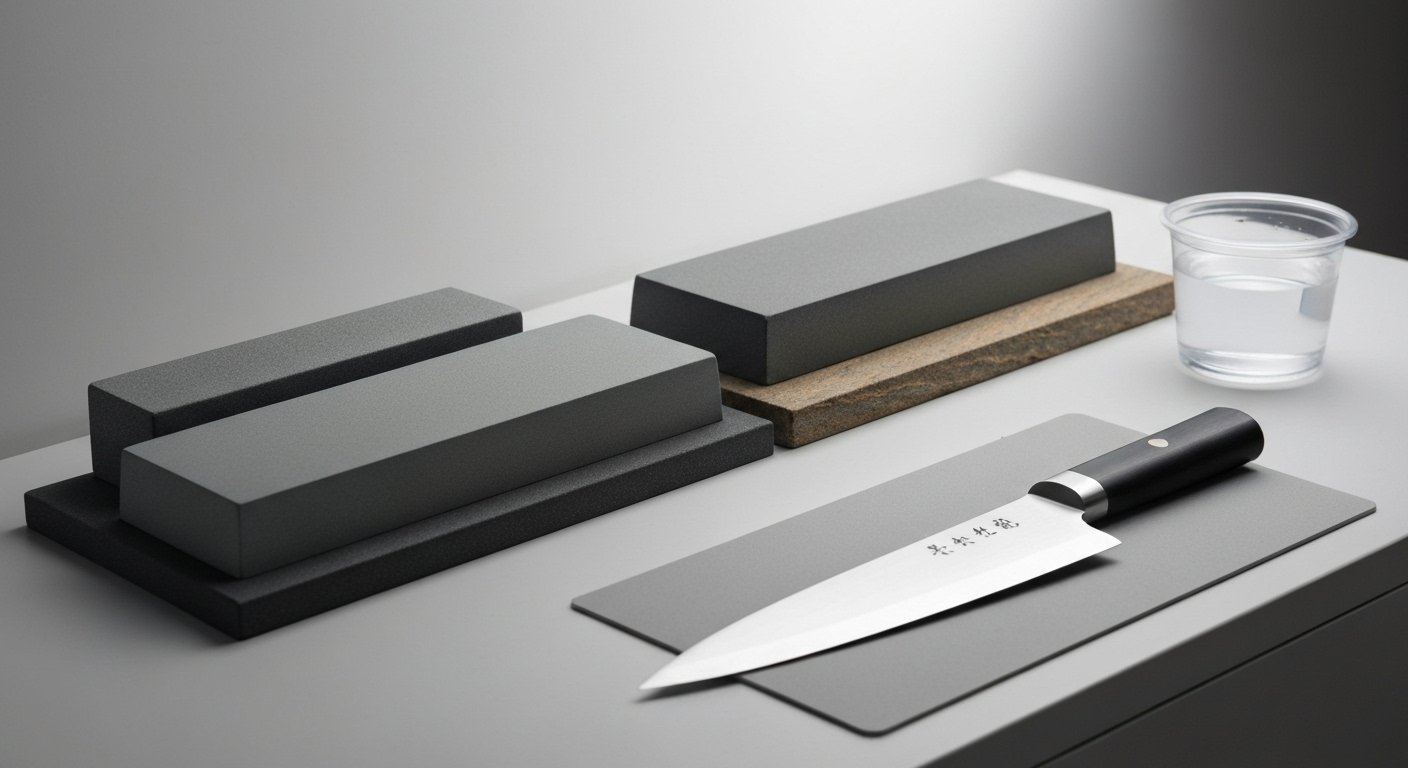
Assembling Your Essential Sharpening Toolkit for Japanese Kitchen Knives
Understanding Whetstones: Grit Levels and Their Purpose
Whetstones, also known as waterstones, are the cornerstone of sharpening Japanese kitchen knives. They are abrasive blocks that, when lubricated with water, abrade the steel of the knife blade, removing material to create a new, sharp edge. Whetstones come in various grit levels, each designed for a specific stage of the sharpening process. Understanding these grit levels is crucial for effective sharpening.
Coarse grit stones (typically 120-1000 grit) are used for repairing damaged edges, restoring extremely dull knives, or significant re-profiling of the blade. They remove material quickly and efficiently. Medium grit stones (1000-4000 grit) are the workhorses of the sharpening process, used for establishing the primary sharpness and refining the edge created by coarser stones. This is where the true cutting edge begins to form.
Fine grit stones (4000-8000 grit and higher) are used for polishing the edge, removing microscopic burrs, and achieving a mirror-like finish, which contributes to an incredibly sharp and smooth cut. Some ultra-fine stones go beyond 8000 grit, offering an almost surgical sharpness. A well-rounded sharpening kit for how to sharpen japanese kitchen knives typically includes at least one stone from each category: a coarse, a medium, and a fine grit.
Water Stone vs. Oil Stone: The Definitive Choice for Japanese Steel
When it comes to sharpening Japanese kitchen knives, the choice between water stones and oil stones is clear: water stones are overwhelmingly preferred and are considered the definitive choice. Water stones are softer and more porous than oil stones, designed to be used with water as a lubricant. As you sharpen, the water forms a slurry with the abrasive particles, which helps to carry away metal swarf and provides fresh abrasive for continuous cutting action.
This self-slurrying action is highly effective for the hard, delicate steels typically found in Japanese knives, allowing for a finer, more precise edge without generating excessive heat. Oil stones, conversely, are harder and require oil as a lubricant. While effective for some steels, they can clog with metal particles, cut more slowly, and generate more friction heat, which can be detrimental to the delicate heat treatment of high-carbon Japanese steel.
Furthermore, water stones typically come in a wider range of high grits, making them ideal for the meticulous polishing required for Japanese knife edges. Using water stones ensures you are preserving the integrity and performance of your blades. To learn more about selecting the right tools, explore our whetstones guide.
Essential Accessories: Nagura Stone, Honing Rods, and Angle Guides
Beyond the primary whetstones, several essential accessories greatly assist in learning how to sharpen japanese kitchen knives effectively. A Nagura stone, for instance, is a small, fine-grit stone used to create a slurry on the surface of your larger whetstones, particularly finer grits. This slurry helps to speed up the sharpening process and ensures a consistent abrasive surface.
Another crucial tool is a flattening stone or lapping plate, used to maintain the flatness of your whetstones. Over time, whetstones develop hollows in their center from repeated use, which can lead to inconsistent sharpening angles and uneven edges. Regularly flattening your stones is vital for consistent results. Brands like Atoma offer excellent diamond flattening plates. A simple pencil can also be used to mark the stone, indicating areas that need to be flattened.
While often associated with Western knives, a ceramic honing rod can be useful for daily maintenance of a Japanese knife’s edge between sharpenings, realigning the micro-burr without removing significant material. Steel honing rods are generally too abrasive for hard Japanese steel and should be avoided. Angle guides, such as clip-on plastic guides, can be helpful for beginners to maintain a consistent angle, though experienced sharpeners often rely on muscle memory and feel. For more general maintenance tips, visit our section on knife care and maintenance.
Mastering the Fundamental Angles for Japanese Knife Sharpening
Double Bevel vs. Single Bevel: Distinct Sharpening Approaches
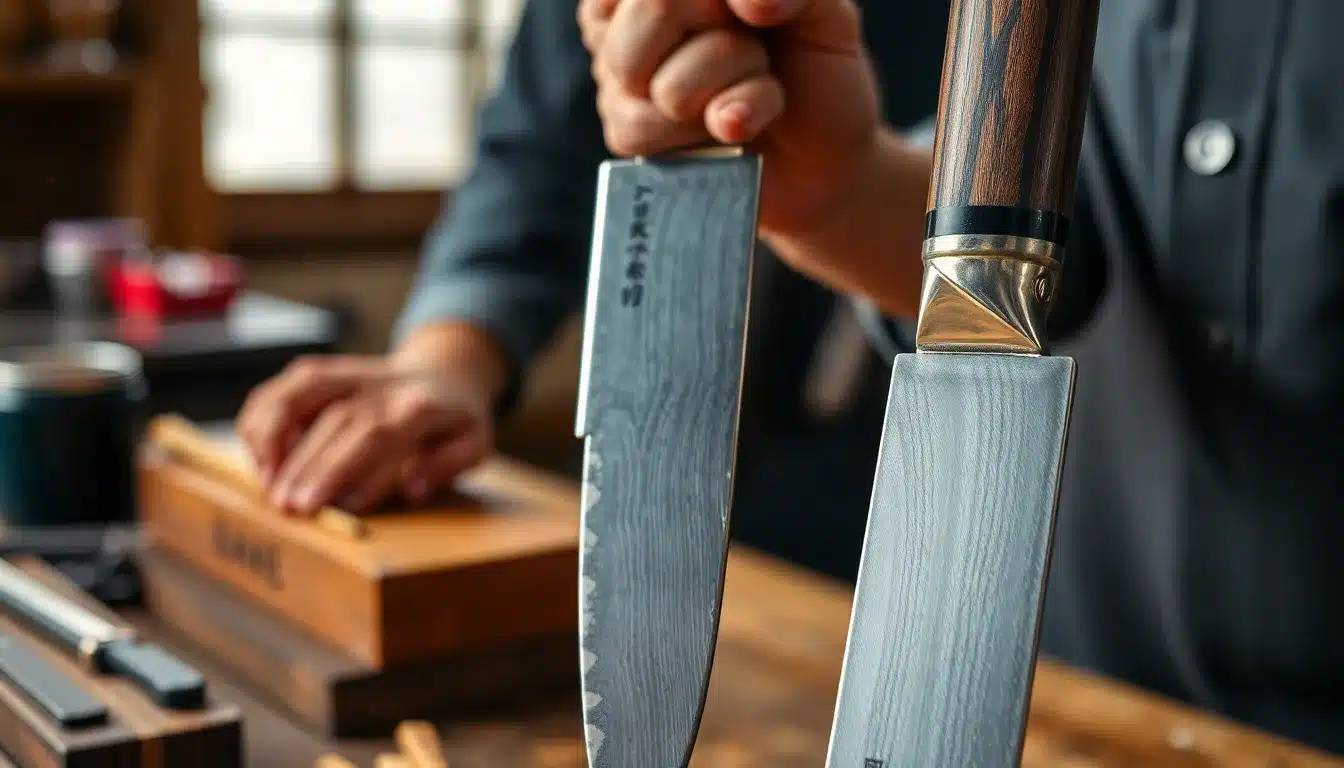
Understanding the difference between double-bevel and single-bevel knives is paramount when learning how to sharpen japanese kitchen knives. Most Japanese knives found in home kitchens, such as Gyutos, Santokus, and Petty knives, are double-bevel (or symmetrical) knives, meaning both sides of the blade are ground to form the cutting edge. These are sharpened on both sides, typically at an angle ranging from 10 to 15 degrees per side, creating a total inclusive angle of 20-30 degrees.
Single-bevel (or asymmetrical) knives, like Yanagiba (sushi slicers), Deba (fish filleting knives), and Usuba (vegetable knives), are fundamentally different. They are sharpened predominantly on one side, with the other side (the ura) being concave or flat to facilitate precise cuts and prevent food from sticking. Sharpening these requires a nuanced approach: the primary bevel is sharpened at a specific angle (often steeper than double-bevels), while the flat or concave ura side is lightly polished to remove the burr and create suction. This distinction is critical for maintaining the intended function and longevity of these specialized knives. You can learn more about these types of knives in our Japanese knife types guide.
The Critical Role of Consistent Angle Holding
The ability to hold a consistent angle is perhaps the most challenging, yet most crucial, aspect of learning how to sharpen japanese kitchen knives. Even a slight variation in angle during the sharpening process can result in a rounded or inconsistent edge, severely impacting the knife’s performance. For double-bevel knives, the goal is to maintain the same angle on both sides as you alternate strokes on the whetstone.
Achieving consistency comes with practice. Many beginners use an angle guide to help them establish the correct angle, but ultimately, developing a tactile feel for the angle is key. You can visualize the angle by holding the knife against the stone, or by using a marker pen to color the edge bevel; if the marker ink is removed evenly across the bevel after a few strokes, your angle is correct. If only the top or bottom of the bevel is abraded, adjust your angle accordingly.
For single-bevel knives, maintaining the correct angle on the primary bevel is even more critical, as it defines the knife’s unique cutting performance. The angle is typically steeper, and consistent contact across the entire bevel is necessary. This precision ensures that the knife cuts as intended, rather than wedging or tearing ingredients. Patience and repetition are your allies in mastering this fundamental skill.
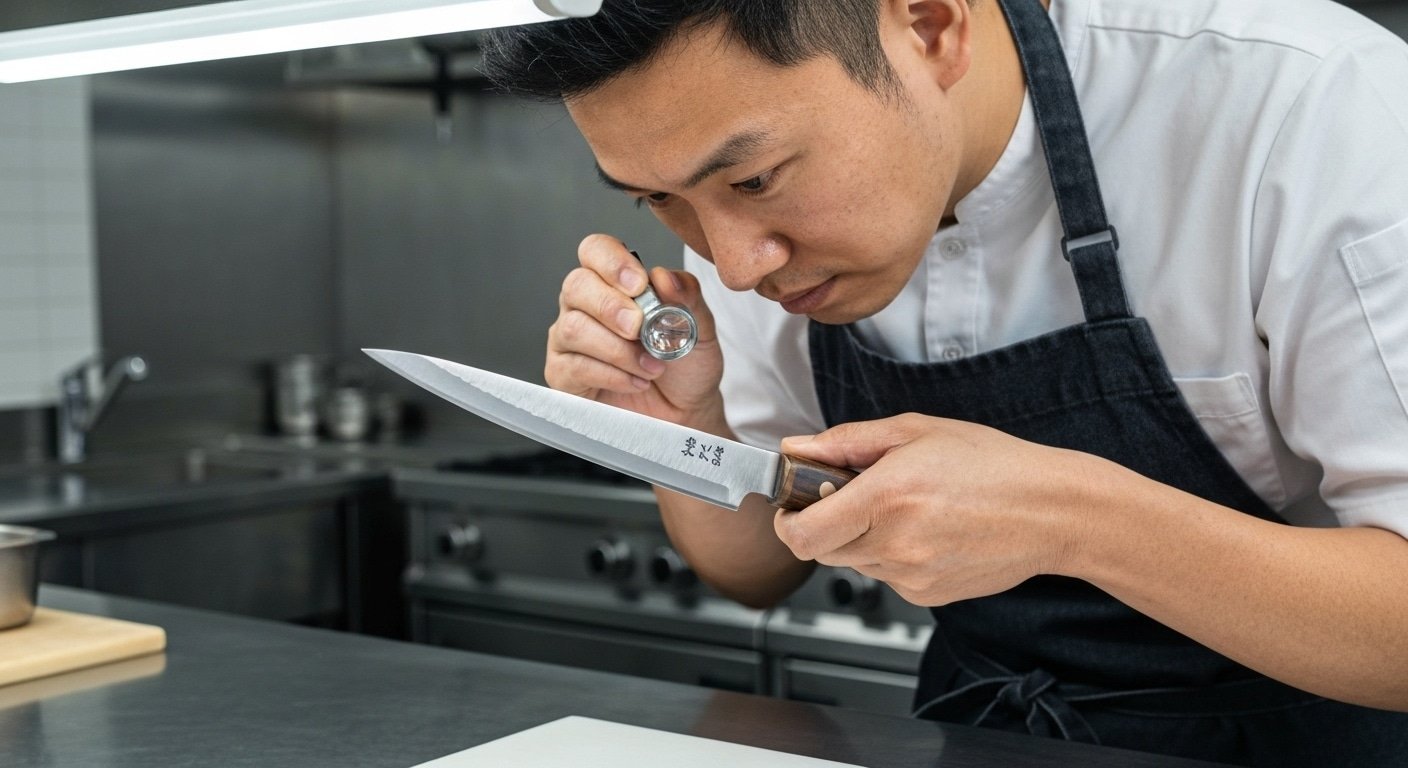
Detecting the Burr: Your Key to a New Edge on Japanese Kitchen Knives
Detecting the burr (also known as a wire edge) is an indispensable skill when learning how to sharpen japanese kitchen knives. The burr is a tiny, microscopic curl of metal that forms on the opposite side of the blade as you sharpen. It indicates that you have successfully brought the abrasive action of the stone all the way to the edge of the blade, creating a new, sharp point. Without forming and removing a burr, you haven’t truly sharpened the knife; you’ve merely abraded the sides.
To detect the burr, carefully run your fingertip across the edge, from the spine towards the cutting edge, on the side opposite to the one you are currently sharpening. You should feel a slight, rough lip or catch along the entire length of the edge. It’s important to be gentle and cautious to avoid cutting yourself. Alternatively, you can use the pad of your thumb or fingernail, or even a piece of tissue paper. A properly formed burr will catch on these surfaces.
Once the burr is formed consistently along the entire length of one side of the blade, you switch to sharpening the other side (for double-bevel knives) until the burr flips to the first side. This process of forming and flipping the burr is a sign that you are effectively sharpening and thinning the edge, ensuring a truly keen and uniform cutting edge. It’s the definitive indicator that you’re ready to move to finer grits for refinement.
The Definitive Step-by-Step Process for Sharpening Japanese Kitchen Knives on Whetstones
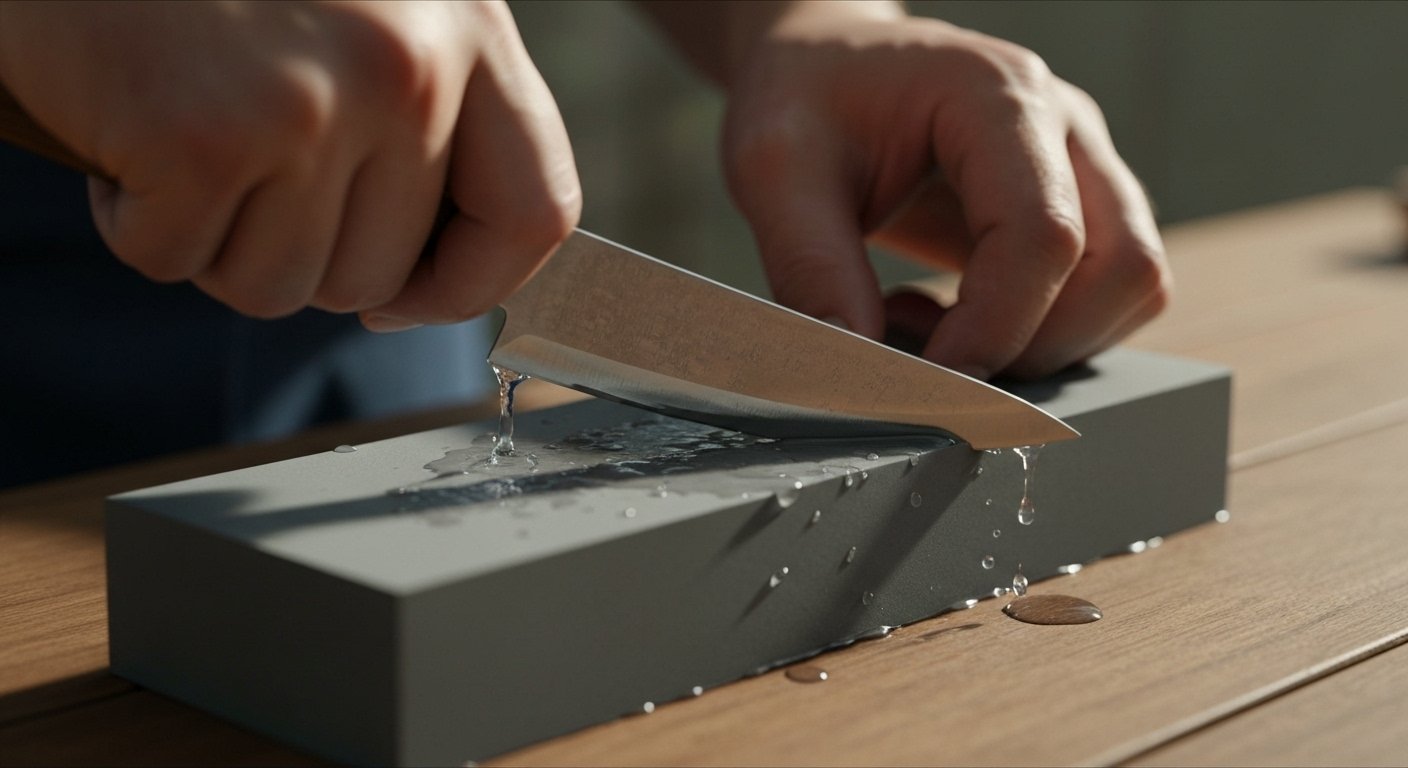
Preparing Your Whetstones: Soaking and Flattening
Before you begin the actual sharpening process, proper preparation of your whetstones is critical. Most Japanese waterstones, particularly those of lower and medium grits (up to 3000-4000), require soaking in water before use. The duration of soaking varies by stone type and manufacturer, but generally ranges from 5 to 15 minutes, or until bubbles stop appearing. This ensures the stone is fully saturated and prevents it from drying out during sharpening, which can lead to clogging and reduced abrasive action. Some modern splash-and-go stones, like those from Shapton or Naniwa, do not require prolonged soaking, but a quick rinse before use is still recommended.
Equally important is maintaining the flatness of your whetstones. As you sharpen, the surface of the stone will inevitably wear down, creating hollows or grooves. A warped or concave stone will make it impossible to achieve a consistent angle and a straight edge on your knife. Use a flattening stone (also known as a lapping plate or truing stone) to regularly true the surface of your whetstones. Place the flattening stone on top of the wet whetstone and rub back and forth in a figure-eight pattern until the entire surface is flat. This ensures optimal contact between the knife and the abrasive, which is essential for learning how to sharpen japanese kitchen knives effectively.
Coarse Grit (1000-2000): Establishing the Primary Edge
The coarse grit stage is where the bulk of the work is done, especially if your knife is very dull, chipped, or needs a new primary bevel. For most routine sharpening of a moderately dull knife, a 1000-grit stone is an excellent starting point. If the knife is extremely dull or has minor chips, you might begin with a 400-grit or 600-grit stone before progressing to 1000. This stage is about removing sufficient material to create a new, consistent apex on the blade.
Place the wet 1000-grit stone on a stable, non-slip surface. Hold the knife at your desired angle (typically 10-15 degrees per side for double-bevels). For single-bevel knives, identify the primary bevel and maintain its angle. Apply light, consistent pressure and use long, even strokes, moving the blade across the stone from heel to tip, ensuring that the entire edge makes contact. Focus on one side of the blade until you feel a consistent burr along the entire length of the opposite side. Then, flip the knife and repeat the process on the other side until the burr flips back.
The goal here is not ultimate sharpness, but to establish a stable, well-formed apex along the entire length of the blade. This foundational work is crucial for subsequent refinement. It’s about patience and consistency, ensuring you’re setting up for success in the finer grit stages of learning how to sharpen japanese kitchen knives.
Medium Grit (3000-5000): Refining the Edge and Polishing
Once you have successfully established a burr on both sides using a coarse grit stone, it’s time to move to a medium grit stone, typically in the 3000-5000 range. This stage refines the edge created by the coarser stone, removes the deeper scratch patterns, and begins to polish the blade’s edge, preparing it for the final, ultra-fine grits. This is where the sharpness truly begins to take shape.
Thoroughly rinse your knife and hands to remove any coarse grit residue before moving to the medium stone. Use the same angle as before, maintaining consistency is key. Apply lighter pressure than with the coarse stone, as the goal is now refinement, not aggressive material removal. Continue with alternating strokes, focusing on reducing the size of the burr and creating a smoother edge. The burr will become much smaller and more delicate at this stage.
As you work, you’ll notice the tactile feedback changes; the stone will feel smoother, and the resistance will decrease. For single-bevel knives, continue to sharpen the primary bevel, making sure the entire surface is being polished. On the ura (back) side, use a few light, flat strokes to ensure it remains flat and burr-free. The aim here is to remove the burr from the previous grit and create a more uniform, refined edge that will take a keen polish in the subsequent steps. This step is indispensable in learning how to sharpen japanese kitchen knives to a high standard.
Fine-Tuning and Deburring: Achieving Razor Sharpness on Japanese Kitchen Knives
Fine Grit (6000+): Achieving a Mirror Polish and Ultimate Sharpness
After refining the edge on a medium grit stone, the next step in achieving true razor sharpness when learning how to sharpen japanese kitchen knives is to move to a fine grit stone, typically 6000 grit and above. This stage is dedicated to polishing the edge to an extremely high degree, removing any remaining microscopic imperfections and creating a mirror-like finish. This highly polished edge glides through food with minimal resistance and exhibits superior edge retention.
Ensure your knife and hands are meticulously clean before progressing to this stone, as any leftover coarser grit particles can scratch the finely polished surface. On the fine grit stone, use very light pressure – often referred to as “the weight of the knife itself.” Use long, deliberate strokes, alternating sides after a few passes. The goal here is not to create a burr, but to progressively reduce and refine the micro-burr from the previous grit, leading to a perfectly apexed edge.
The feedback from the stone will be incredibly smooth, almost silent. You’ll notice the edge becoming incredibly reflective. For single-bevel knives, continue polishing the primary bevel with light pressure, ensuring an even polish across the entire surface. On the ura, use even lighter, flat strokes to refine and ensure no burr remains. This meticulous attention to detail at the fine grit stage is what elevates a merely sharp knife to a truly exceptional cutting instrument.
The Art of Deburring: Removing the Micro-Burr for a Clean Edge
Even after progressing through fine grits, a microscopic burr often remains along the edge. This tiny curl of metal, while indicative of a formed edge, will degrade quickly if not properly removed, leading to a seemingly dull knife despite your sharpening efforts. The art of deburring is crucial for a stable, long-lasting, and truly clean edge when learning how to sharpen japanese kitchen knives.
There are several effective deburring techniques. One common method involves performing very light, alternating strokes on the fine grit stone, reducing the pressure with each pass until you are using virtually no pressure. The goal is to gently abrade the burr until it detaches. Another technique is to use “feather light” edge-trailing strokes on the fine grit stone – pulling the blade across the stone with the edge trailing, rather than leading, at a slightly increased angle (micro-beveling). This can gently push the burr off without forming a new one.
For single-bevel knives, deburring the ura (flat/concave side) is performed by laying the blade perfectly flat on the stone and applying extremely light pressure, using a few strokes to “wipe” away any remaining burr. Some sharpeners also use denim, cork, or even balsa wood to remove the final vestiges of the burr. The key is to be extremely gentle, as excessive pressure will simply create a new burr. A truly deburred edge will feel smooth and consistent along its entire length.
Stropping Techniques for Unparalleled Sharpness
Stropping is the final, optional, but highly recommended step to achieve unparalleled sharpness and a truly refined edge on your Japanese kitchen knives. A strop is typically a piece of leather (or sometimes denim or balsa wood) mounted on a firm backing, often charged with abrasive compounds like chromium oxide paste or diamond sprays. Stropping doesn’t remove significant material; instead, it polishes the very apex of the edge, realigns any microscopic deviations, and removes any remaining burr that may have escaped the deburring process on the whetstone.
To strop, hold the knife at a slightly higher angle than your sharpening angle – just enough to ensure the very edge makes contact. Use light, edge-trailing strokes, meaning the spine of the knife leads the movement, and the edge trails behind. Never push the edge into the strop, as this will dig in and ruin the edge. Alternate sides after a few strokes, gradually reducing pressure to almost none. The number of strokes depends on the desired level of polish and the initial condition of the edge, but typically 10-20 alternating passes are sufficient.
The result of proper stropping is an edge that feels incredibly smooth, almost sticky, and can effortlessly glide through the most delicate ingredients. It’s the finishing touch that truly defines mastery in how to sharpen japanese kitchen knives, taking the sharpness from excellent to extraordinary. Regularly stropping your knives can also extend the time between full re-sharpenings, helping to maintain that peak performance.

Advanced Techniques and Troubleshooting for Sharpening Japanese Kitchen Knives
Repairing Chipped Edges and Damaged Tips
Despite their superior performance, Japanese kitchen knives, especially those made of harder steels, can be prone to chipping if misused or dropped. Repairing chipped edges or damaged tips requires a more aggressive approach than routine sharpening but is entirely possible when learning how to sharpen japanese kitchen knives. For chips, you’ll need to start with a very coarse grit whetstone, typically 120-400 grit. The goal is to grind down the entire edge until the bottom of the chip disappears, effectively creating a new, lower edge line.
Identify the deepest part of the chip and aim to grind the surrounding edge down to that level. This often means removing a significant amount of steel. For small chips, you can focus your pressure around the chipped area. For larger chips, you might need to re-profile a larger section of the blade to maintain the original curvature. This process requires patience and consistent angle work. Once the chip is gone, gradually progress through your medium and fine grit stones as you would for regular sharpening.
For a damaged or broken tip, use a coarse stone to carefully reshape the tip, blending it smoothly into the blade’s profile. This usually involves grinding both the spine and the edge side of the tip simultaneously to restore symmetry. Always work slowly and deliberately to avoid removing too much material or creating an awkward shape. Once the tip is restored, proceed with the normal sharpening progression to refine the newly formed edge around the tip area.
Thinning the Blade (Urasuki for Single Bevels): Beyond the Edge
While learning how to sharpen japanese kitchen knives primarily focuses on the cutting edge, advanced maintenance often involves thinning the blade, particularly for single-bevel knives. Over time, repeated sharpening can cause the area just behind the cutting edge to become thicker, leading to diminished cutting performance even if the edge itself is sharp. This phenomenon is known as “shouldering” and prevents the knife from gliding smoothly through food.
For double-bevel knives, thinning involves gently grinding the primary bevel (the area above the cutting edge) on a medium grit stone at a slightly lower angle than your sharpening angle, removing some material from the blade face itself. This effectively reduces the “thickness behind the edge,” allowing the knife to wedge less as it cuts. This is a delicate process that requires careful monitoring to avoid creating an uneven surface or damaging the blade.
For traditional single-bevel Japanese knives, the concept is called Urasuki (for the concave back side) and Shinogi (for the primary bevel side). The Urasuki is the hollow grind on the back of the blade, which is critical for food release and precise cutting. Over time, the rim of this hollow can wear. Thinning the Urasuki involves carefully re-establishing this hollow on a fine grit stone, often by laying the blade flat and using light pressure on specific areas. Thinning the Shinogi involves re-establishing the primary bevel angle on the front side of the blade, ensuring the knife continues to perform as intended. These are advanced techniques that significantly impact cutting performance and are key for long-term maintenance of high-performance Japanese blades.
Common Sharpening Pitfalls and How to Overcome Them
Even with a clear guide on how to sharpen japanese kitchen knives, pitfalls are common. One frequent issue is an inconsistent angle, which results in a rounded or ineffective edge. Overcome this by focusing on muscle memory, using an angle guide initially, and regularly checking your progress with the marker test. Another pitfall is insufficient burr formation, meaning you haven’t brought the edge to a true apex. This is often due to not enough pressure or not spending enough time on the coarse grit. Ensure you feel a consistent burr along the entire edge before progressing.
Excessive pressure is another common mistake, especially on finer grit stones. Too much pressure can create a larger burr that is difficult to remove, or even cause the edge to roll or chip on delicate Japanese steel. Use lighter pressure as you move to finer grits. Conversely, not enough pressure on coarser stones will make the process excessively slow. Finding the right balance of pressure is key. For brands like King and Naniwa, the instructions often provide guidance on appropriate pressure.
Neglecting to flatten whetstones regularly is a major pitfall, as a dished stone makes consistent sharpening impossible. Make it a habit to flatten your stones before or after each sharpening session. Finally, impatience and rushing the process often lead to subpar results. Sharpening is a meditative process that requires patience and attention to detail. Take your time, focus on each step, and enjoy the journey to a perfectly sharp knife. Overcoming these common issues will significantly improve your sharpening success.
Sustaining and Verifying the Peerless Sharpness of Your Japanese Kitchen Knives
The Importance of Honing vs. Sharpening for Daily Maintenance
Understanding the distinction between honing and sharpening is fundamental to maintaining the peerless sharpness of your Japanese kitchen knives. Sharpening, as discussed, involves removing a small amount of steel from the blade to create a new, sharp edge, typically using whetstones. It is a more aggressive process performed when the knife is truly dull or has lost its edge geometry.
Honing, on the other hand, does not remove significant material. Instead, it realigns the microscopic edge of the blade that has been bent or rolled over through regular use. Think of the knife edge as a finely tuned instrument; with repeated cutting, the very apex of the edge can get misaligned or fold over, making the knife feel dull even if it’s not truly blunt. A honing rod, ideally ceramic or a fine-grit stropping leather, is used for this purpose.
Regular honing, perhaps after every few uses or daily for busy chefs, is crucial for daily maintenance and extends the life of your sharpened edge. It prevents the knife from becoming dull enough to require full re-sharpening as frequently. However, it’s important to use a ceramic rod or a very fine diamond rod, as traditional steel honing rods can be too abrasive for the hard, thin edges of Japanese knives and may cause more damage than good. This proactive approach significantly contributes to the longevity of your knife’s performance and is a vital part of learning how to sharpen japanese kitchen knives effectively over time.
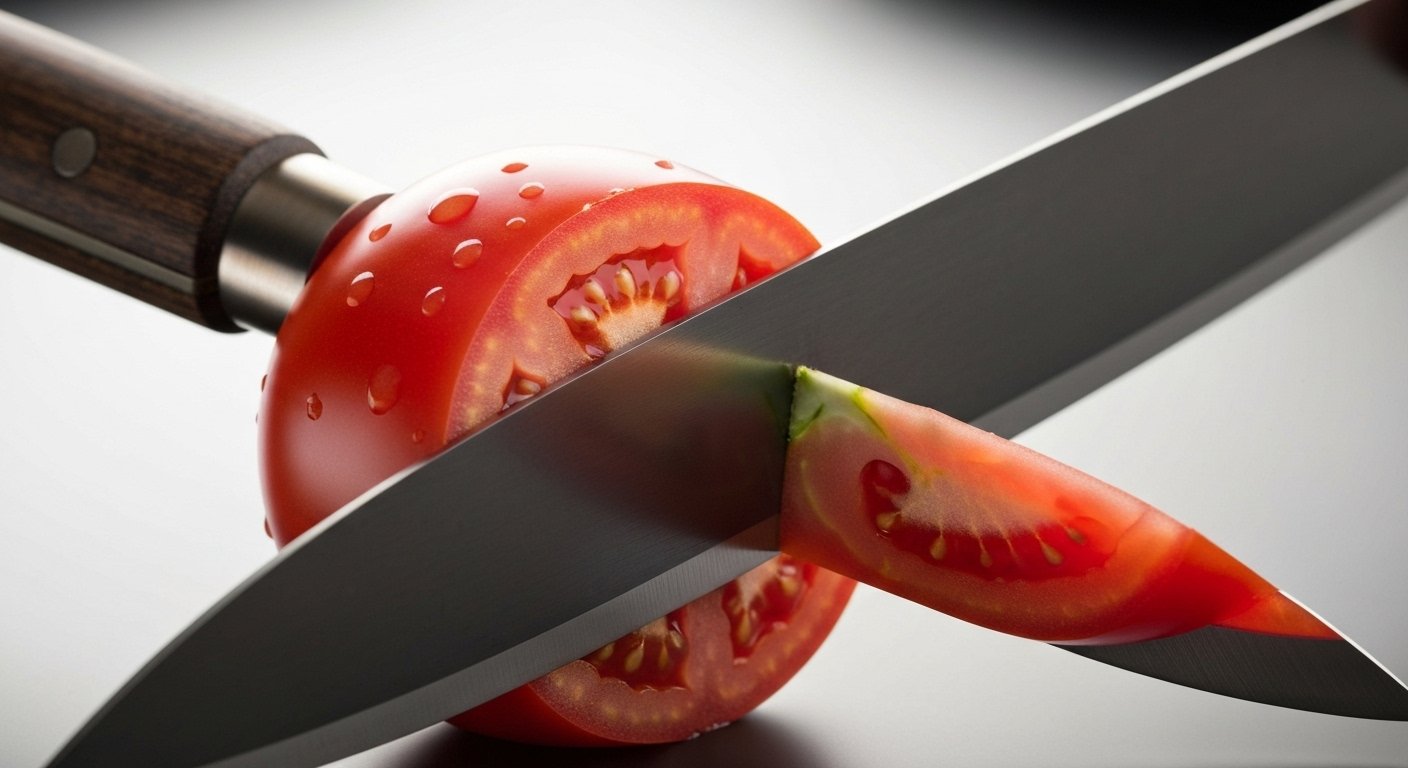
Practical Sharpness Tests: From Paper Slicing to Tomato Cutting
After going through the meticulous process of how to sharpen japanese kitchen knives, you’ll want to verify your results with practical sharpness tests. These tests provide tangible feedback on the quality of your edge. One of the simplest and most common tests is the paper test. Hold a piece of newspaper or printer paper upright and attempt to slice through it without tearing. A truly sharp knife will slice through the paper effortlessly, without snagging or folding the paper, and can even slice off thin strips.
Another excellent test is the tomato test. A sharp knife should be able to slice through the skin of a ripe tomato with minimal pressure, without having to saw or crush the tomato. The ideal cut will be clean and smooth. For an even more demanding test, try slicing through a slippery onion without holding it, or attempting to cut extremely thin, translucent slices of produce. A truly razor-sharp Japanese knife will make these tasks feel effortless.
For experienced sharpeners, the “hair-shaving” test or the “thumb-pad” test (where the knife gently sticks to the skin without cutting) can also indicate extreme sharpness. While these tests are great indicators, remember that the ultimate test is how the knife performs in its intended use in the kitchen. Consistent success with these practical tests confirms that you’ve mastered the art of restoring a superior edge to your Japanese knives.
Post-Sharpening Care and Long-Term Storage for Optimal Performance
The journey of how to sharpen japanese kitchen knives doesn’t end with a razor-sharp edge; proper post-sharpening care and long-term storage are equally vital for maintaining optimal performance and preserving your investment. After sharpening, always thoroughly rinse and dry your knife immediately. Japanese knives, especially those made from high-carbon steel, are highly susceptible to rust and corrosion if left wet. Use a soft cloth to ensure no moisture remains on the blade or handle.
For carbon steel knives, it’s advisable to apply a thin layer of food-safe mineral oil to the blade before storage. This creates a protective barrier against moisture and air, preventing rust. Even stainless or semi-stainless knives benefit from occasional oiling, particularly if stored for extended periods. Do not store knives in a drawer where they can jostle against other utensils, as this can dull or chip the finely sharpened edge.
Ideal storage methods include a magnetic knife strip (ensuring the edge isn’t repeatedly scraped against the magnet), a knife block with individual slots, or blade guards (saya) for each knife. If using blade guards, ensure the knife is completely dry before sheathing it to prevent moisture from getting trapped. By dedicating attention to these post-sharpening rituals, you ensure your meticulously sharpened Japanese knives remain in pristine condition, ready for their next culinary adventure.
The Enduring Craft of Sharpening Japanese Kitchen Knives
Embracing the Journey to Mastery in Knife Maintenance
The art of how to sharpen japanese kitchen knives is a journey, not a destination. It requires patience, practice, and a willingness to learn from each session. What might initially seem like a daunting task will, with time and repetition, become a meditative and deeply satisfying skill. Each stroke on the whetstone brings you closer to understanding the nuanced relationship between steel, angle, and ultimate sharpness. This pursuit of mastery extends beyond the mere act of sharpening; it embodies a respect for the craftsmanship of the knives themselves and the culinary traditions they represent.
Embracing this journey means acknowledging that perfection isn’t achieved overnight. There will be frustrating moments, but these are opportunities for growth and refinement of your technique. Seek out resources, watch skilled artisans, and don’t be afraid to experiment with different approaches to find what works best for you and your specific knives. The tactile feedback from the stone, the whisper of the steel, and the eventual effortless glide of a perfectly sharp blade become profoundly rewarding experiences.
Preserving the Legacy of Precision and Performance
By dedicating yourself to learning how to sharpen japanese kitchen knives, you are not just maintaining a tool; you are actively participating in preserving a legacy of precision and performance that spans centuries. Japanese knife making is an ancient craft, imbued with tradition and a relentless pursuit of perfection. These knives are designed to be heirlooms, passed down through generations, and proper sharpening is key to their longevity and continued excellence.
A well-maintained Japanese knife is a testament to both the maker’s skill and the owner’s dedication. It ensures that every cut is precise, every ingredient is respected, and every culinary creation is elevated. The investment of time and effort in mastering sharpening techniques is an investment in the longevity and peak performance of these exceptional kitchen tools. It allows you to fully appreciate the unique characteristics of your knives and to experience the joy of cooking with instruments that consistently perform at their absolute best.
For more insights and products related to Japanese knives, explore our website:
Japanese Knives World
Expert reviews, buying guides and craftsmanship stories about Japanese kitchen knives.
Talk to the teamRelated articles
The Definitive 2025 Japanese Chef Knives Reviews: A Professional Evaluation of Performance and Craftsmanship
Navigating the world of high-end cutlery requires a deep understanding of metallurgy, ergonomics, and traditional craftsmanship. In this definitive guide to japanese chef knives reviews, we evaluate the top-tier blades that are defining the culinary landscape in 2025. Whether you are a professional executive chef or a dedicated home cook, selecting the right Japanese blade […]
Zwilling Japanese Knives: The Ultimate Professional Evaluation for 2025
Welcome to the definitive guide for discerning chefs and culinary enthusiasts exploring the exceptional world of zwilling japanese knives. This comprehensive evaluation for 2025 delves into how these meticulously crafted tools, primarily under the esteemed Miyabi brand, fuse German engineering precision with ancient Japanese blade artistry. Discover why these premium knives are not just instruments, […]
Unveiling the Ultimate Japanese Chefs Knives Review: Expert Insights for 2025
Welcome to the definitive guide on the finest Japanese culinary tools. This comprehensive japanese chefs knives review dives deep into the world of precision craftsmanship, unparalleled sharpness, and ergonomic design that sets Japanese knives apart. Choosing the right chef knife can profoundly transform your cooking, making every slice, dice, and chop a true pleasure. We […]